Hi everyone!
Now MachePte also has an account on twitter, if you also have one do follow to know whatever is new upon my paper mache creations.
https://twitter.com/MachePt, see you there!!
terça-feira, 28 de junho de 2016
Paper mache Portuguese baroque royal coat of arms II
Hi everyone!
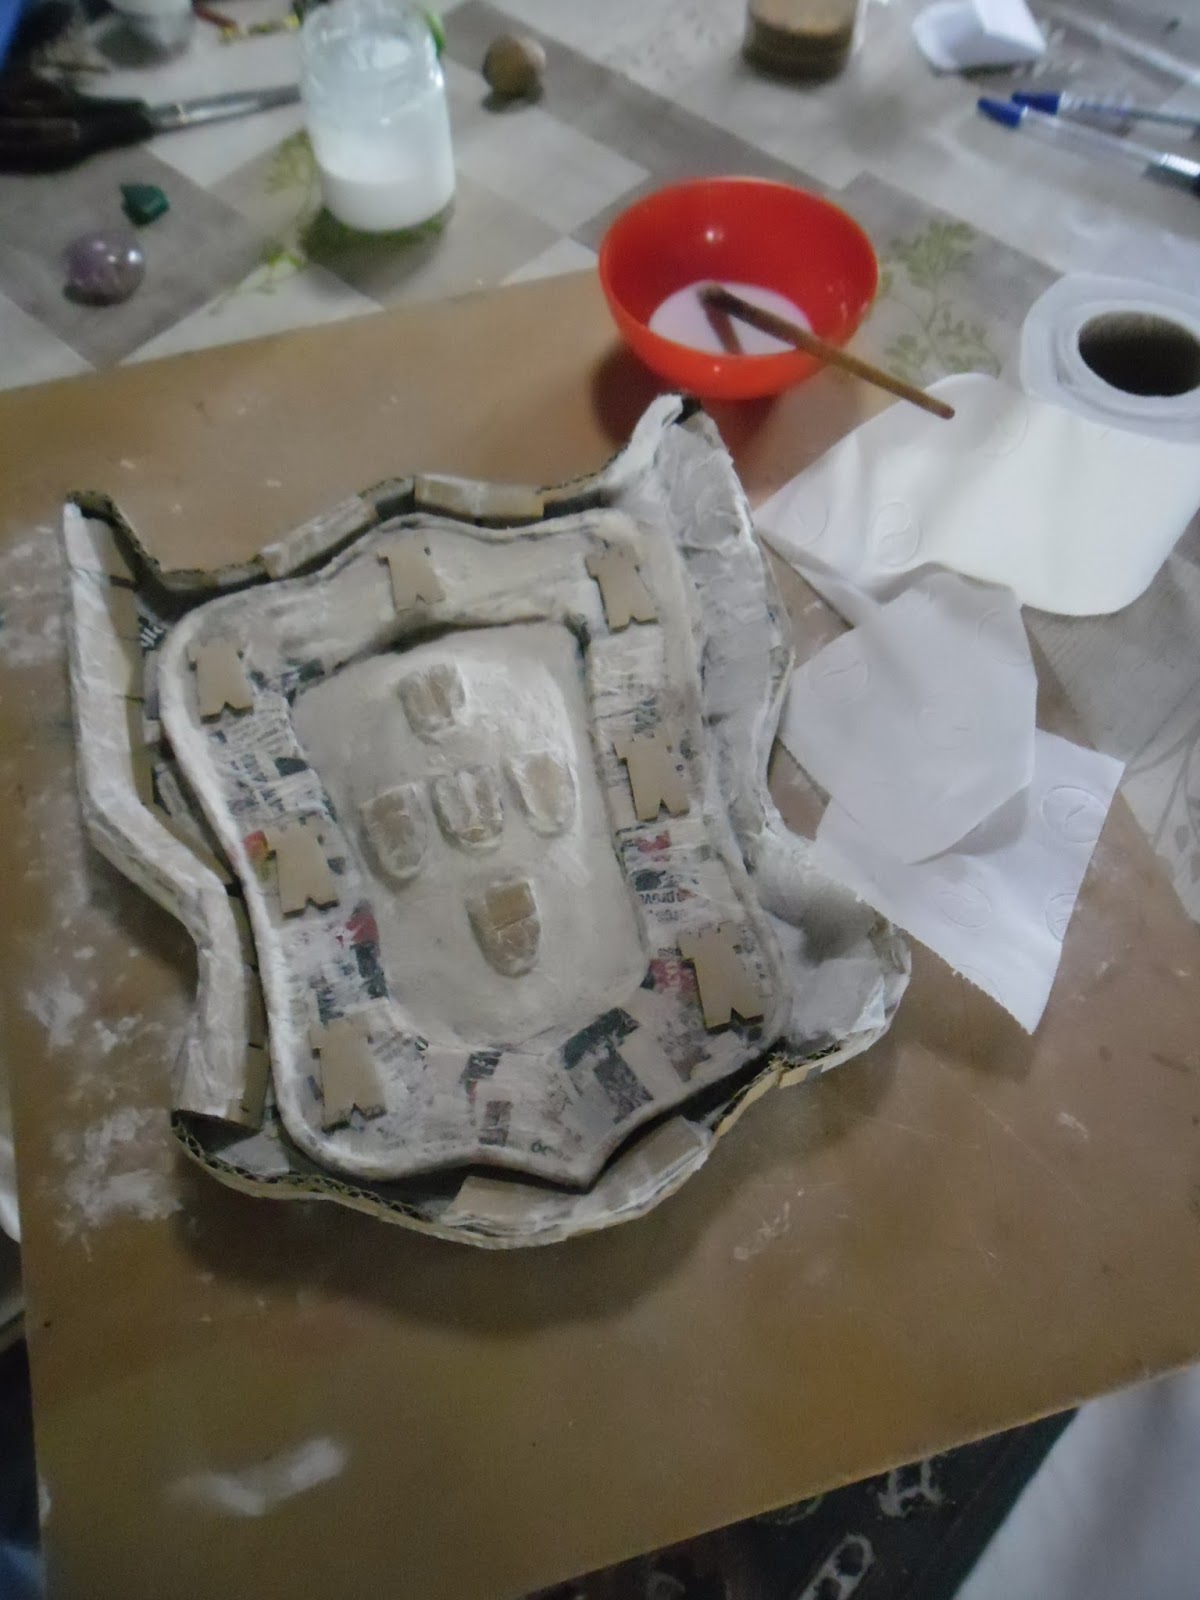
Here's some new advancements on the coat of arms.
When I made the first post we had this:

Which became this:

To be honest with you I dont know if there are specific names for upper decoration or base decoration, I only know that the purpose of the upper decoration is in order to sustain a crown. Eitherway for both bases, inspired by the original design, I've glue two empty toilet paper cardboard roll which I've sort of started already to work a bit (as you can see on the base)
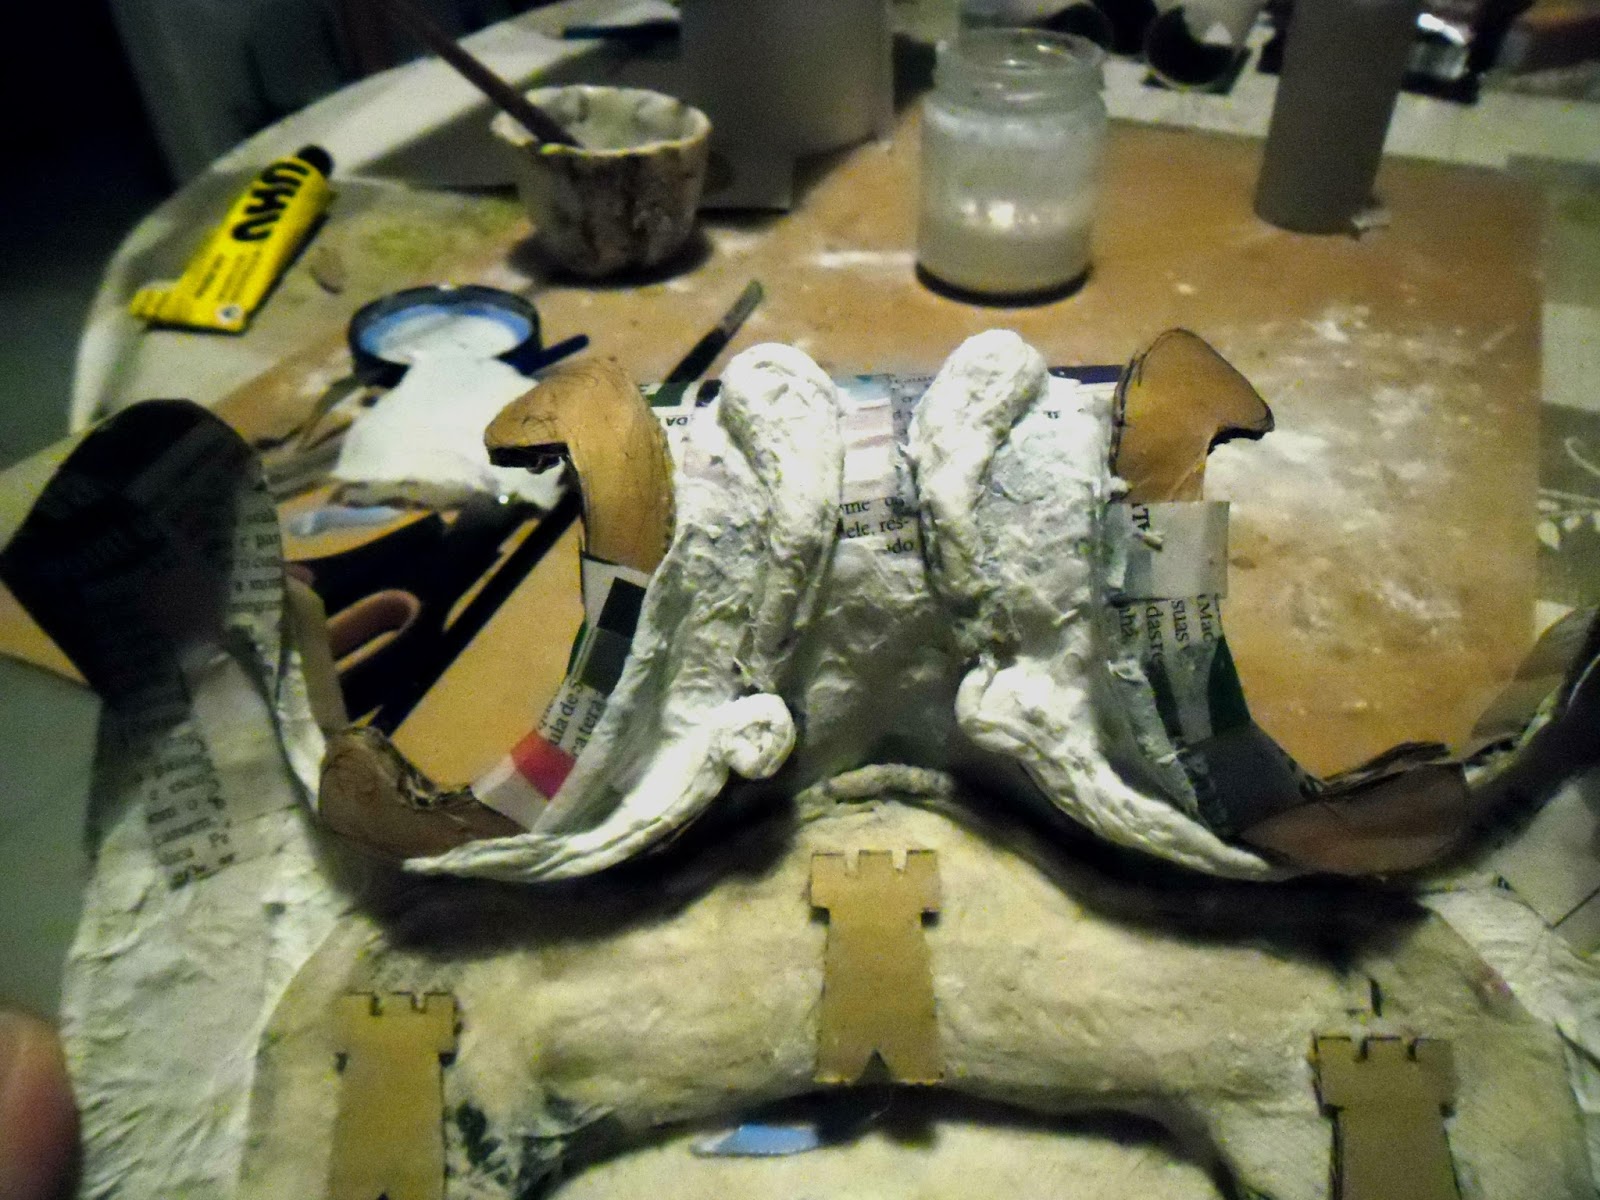
 So now we have a photo of the lower tip and to start with all of those swirls I've cut, in thin cardboard, some C shaped decorations onto which...
 ... I glued toilet paper and started to work the volumes.
For the upper decoration I did exactly the same although its a tiny bit more elaborate


 And now we have this:
 It does looks messy and and a bit clumsy but in time after remodelling the whole thing with bit of toilet paper here and there i will for sure get a bit more symmetric. Those sort of ears on the upper bit? I'll talk about those on my next post!
Until then do share your thoughts or if you have any question I'll be happy to answer!
Thanks for visiting :)
Here's some new advancements on the coat of arms.
When I made the first post we had this:
Which became this:

To be honest with you I dont know if there are specific names for upper decoration or base decoration, I only know that the purpose of the upper decoration is in order to sustain a crown. Eitherway for both bases, inspired by the original design, I've glue two empty toilet paper cardboard roll which I've sort of started already to work a bit (as you can see on the base)
 So now we have a photo of the lower tip and to start with all of those swirls I've cut, in thin cardboard, some C shaped decorations onto which...
 ... I glued toilet paper and started to work the volumes.
For the upper decoration I did exactly the same although its a tiny bit more elaborate


Until then do share your thoughts or if you have any question I'll be happy to answer!
Thanks for visiting :)
sexta-feira, 24 de junho de 2016
Paper mache Portuguese baroque royal coat of arms
Hi everyone!
I've started this coat of arms ages ago! It was one of those projects that require lots of time and as I have lots of mood swings and inspiration takes me to different ideas within minutes I thought this would be another project to end up on the garbage!
As today I thought upon the old idea of doing videos with my historical figures, also thought that if I'd finish the coat of arms could give a nice touch to the background so here I go!
I dont like easy things so when I decided to make a coat of arms I decided to go on a baroque or rococo style as its my favourite artistic and historical epoch.
Dont have any photos of its beginings but I can tell you a little bit. I took a plaque of cardboard and cutted it according to the shape I want, then I filled its center with some cardboard left overs and modeled it with toilet paper, Also in cardboard I've designed the shields and the towers. Because the exterior is to pretend to be made from a shell I've created some "walls", covered it with paper stripes and now I'm remodeling its interior with toilet paper as its soft and, as you know, its one of my favourite moddeling pasts when soaked in glue!
Enjoy!

quarta-feira, 22 de junho de 2016
How to make paper mache canvas
I'm so excited to come back to blog writting that I totally forgot that it has been probably over a year that I havent posted nothing.
As I wrote on a previous post there has been lots going on and within that idea of "lots" back in January, when I started to make paper mache canvas for my oil self portraits, I've also made and posted a video for my youtube channel with its "recipe"
I remember sharing it with the website ultimatepapermache.com and was a huge success!
You can also learn how to make them. Its super easy, cheap, creative and environment friendly!
So here's the video and ... have fun!!!
Thanks for visiting!
Animal portraits on paper mache canvases
Hi everyone!
Its been two weeks now that I've defocused a bit from the dolls and went back at painting! Felt doing something new so I started to make these:


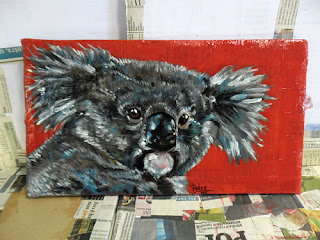
The paper mache canvases were already there and I just needed to grab the brushes!
It was fascinating to perceive how much I've shifted colour wise, technique and even subject wise as before I'd prefer a more caravaggio's kind of colour palette, oils instead of acrylics and either portraits or self portraits!
I am so thrilled that I decided to open an Etsy shop! Want to have a look? Then go to https://www.etsy.com/shop/MachePTe
Thanks for visiting!
Its been two weeks now that I've defocused a bit from the dolls and went back at painting! Felt doing something new so I started to make these:


The paper mache canvases were already there and I just needed to grab the brushes!
It was fascinating to perceive how much I've shifted colour wise, technique and even subject wise as before I'd prefer a more caravaggio's kind of colour palette, oils instead of acrylics and either portraits or self portraits!
I am so thrilled that I decided to open an Etsy shop! Want to have a look? Then go to https://www.etsy.com/shop/MachePTe
Thanks for visiting!
"MyRoyalDolls Collectibles"
Hi everyone, its been a while since I dont post nothing, true. So so sorry!
I have been quite busy on producing stuff and then there's an obvious lack of energy to write things down... But I'm back and willing to share!
Much as been going on - not only creative wise - wanted to get rid of all my projects, some I've putted them on the garbage, others I tried to offer them... ALL in order to have more space free to work on other things.
Whilst intelectualy wise my MyRoyalDolls project took over of all my atention, I thought that the so called "birdies" (sculptures of birds with human faces) could also be commercial here in Sintra (as I've tried them in Lisbon) so I started to do some contacts online with shops and from the few that answered I ended up by going to a really cool one owned by a really nice gentleman - H'art Portugal (@ https://www.facebook.com/HartPortugal) who, instead of liking the animal sculptures, was much fond of the royal dolls! I said "thanks but no thanks!" as its my personal collection! But ... within minutes I thought upon doing smaller versions and the "MyRoyalDolls Collectibles" were born!!!
Process making wise I first make a wire structure and fill it with toilet paper soaked in glue and the rest depends on its gender, attire, etc. For smoother surfaces, just like on the "big" MyRoyalDolls, I use air drying modelling paste and whenever I want to stiff a piece of paper (like a cloak or a skirt) I cover it with what I call cold porcelain liquid (which simply is starch+white glue+water)
Check out this "sketch" of an early 17th century lady and you'll understand a bit better the above description

Et voilá!
If you want to see more of these please go to myroyaldolls.wix.com/myroyaldolls - as soon as you decide the language the menu page will open and you clic on... well, whatever you want to see! Eh eh eh
Thank you for visiting!
I have been quite busy on producing stuff and then there's an obvious lack of energy to write things down... But I'm back and willing to share!
Much as been going on - not only creative wise - wanted to get rid of all my projects, some I've putted them on the garbage, others I tried to offer them... ALL in order to have more space free to work on other things.
Whilst intelectualy wise my MyRoyalDolls project took over of all my atention, I thought that the so called "birdies" (sculptures of birds with human faces) could also be commercial here in Sintra (as I've tried them in Lisbon) so I started to do some contacts online with shops and from the few that answered I ended up by going to a really cool one owned by a really nice gentleman - H'art Portugal (@ https://www.facebook.com/HartPortugal) who, instead of liking the animal sculptures, was much fond of the royal dolls! I said "thanks but no thanks!" as its my personal collection! But ... within minutes I thought upon doing smaller versions and the "MyRoyalDolls Collectibles" were born!!!
 |
| King Sebastian I of Portugal |
 |
| Victorian couple |
 | |||||
| Fado - Portugal's national song |
Process making wise I first make a wire structure and fill it with toilet paper soaked in glue and the rest depends on its gender, attire, etc. For smoother surfaces, just like on the "big" MyRoyalDolls, I use air drying modelling paste and whenever I want to stiff a piece of paper (like a cloak or a skirt) I cover it with what I call cold porcelain liquid (which simply is starch+white glue+water)
Check out this "sketch" of an early 17th century lady and you'll understand a bit better the above description

Et voilá!
If you want to see more of these please go to myroyaldolls.wix.com/myroyaldolls - as soon as you decide the language the menu page will open and you clic on... well, whatever you want to see! Eh eh eh
Thank you for visiting!
Subscrever:
Mensagens (Atom)